How to Compare Dental Plans Online: An 8-Step Process
🇺🇸 Built for U.S. Consumers
📋 Online Plan Comparison
💰 Understand Costs
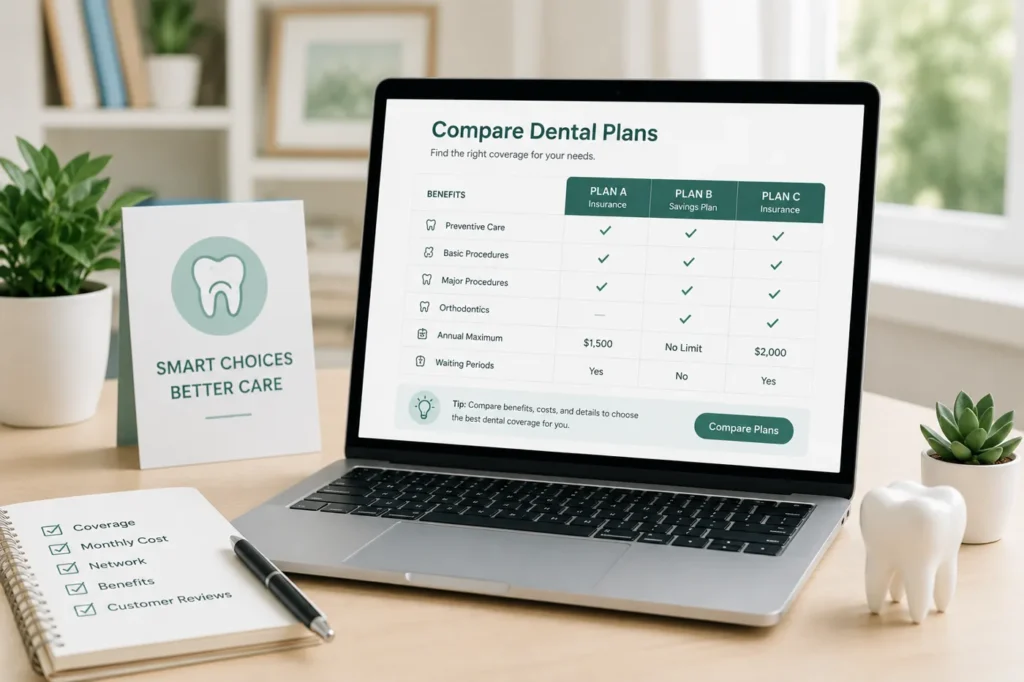
Use a consistent process to collect plan documents, verify provider networks, compare the same details, and confirm enrollment information before making a decision.
Written and researched by Maria Dumitru.
Founder and Content Editor at Dental Coverage Hub
Last reviewed: August 2026
What You’ll Learn
Comparing dental plans online involves more than opening several plan pages and choosing the lowest displayed premium.
A useful comparison follows the same process for every option. You need to confirm that the plans were generated for the same enrollment scenario, identify the exact product and plan name, collect comparable documents, verify the correct provider network, record information consistently, and investigate missing or conflicting details.
Read Compare Dental Plans for a broader explanation of the costs, coverage rules, networks, and benefit limits that may affect a comparison.
Key Takeaways
- Compare every plan using the same location, household, coverage tier, and intended effective date.
- Record the exact product type, plan name, network, and enrollment channel.
- Use official plan documents rather than relying only on marketing summaries or comparison cards.
- Verify the exact network, dentist, practice location, and specialist participation when relevant.
- Save the documents, dates, URLs, written confirmations, and final enrollment details.
In This Guide
What Comparing Dental Plans Online Actually Involves
An online dental plan comparison may include several different activities:
- Browsing available plans.
- Viewing estimated premiums or quotes.
- Reading plan-summary pages.
- Opening official benefit documents.
- Searching a provider directory.
- Confirming information with an insurer or dental office.
- Reviewing enrollment terms.
- Saving the final documents and confirmation details.
These steps do not provide the same level of information.
A comparison card may show a premium and a few benefit highlights. A quote may reflect information entered into a form. A provider directory may show whether a dentist is listed in a particular network. The official plan documents contain more detailed terms, exclusions, limits, and enrollment conditions.
For that reason, an online comparison page or quote page should generally be treated as a starting point rather than the complete comparison.
The goal is to connect the information shown online with the exact documents and network that apply to the plan being considered.
Before You Start: Use the Same Coverage Scenario
Plans should be compared using the same basic enrollment scenario.
Before opening multiple plan pages, decide which information you will use consistently:
- State and ZIP code.
- People who need coverage.
- Individual, couple, or family enrollment tier.
- Ages of covered household members when requested.
- Intended effective date.
- Enrollment channel.
- Expected dental-care assumptions.
- Preferred dentist or network requirements.
If you already expect a specific dental treatment, include it in the comparison scenario. Record the actual procedure you want to investigate rather than relying only on broad labels such as “basic” or “major” care.
Also identify related treatment that may need to be evaluated separately. For example, a root canal may be followed by a filling or crown, while an extraction may later be followed by a bridge, implant, or denture.
Use Dental Insurance Coverage for Common Procedures to identify the procedure-specific questions that should be included in your comparison.
When possible, use the same enrollment channel for every option. A plan offered through an employer, insurer website, Marketplace, broker, or comparison platform may have different documents, eligibility rules, or enrollment terms.
Two displayed premiums may not be directly comparable when one was generated for individual coverage and the other for family coverage, or when the plans use different locations, effective dates, or household information.
Keep a short record of the scenario used so you can reproduce the search later.
How to Compare Dental Plans Online in 8 Steps
Step 1: Record the Exact Product and Plan Name
Begin by identifying what is actually being displayed.
Record:
- Company or consumer-facing brand.
- Exact plan name.
- Product type.
- State or service area.
- Individual, couple, or family tier.
- Enrollment channel.
- Name of the insurer or underwriting company when different from the visible brand.
- Name of the plan administrator when identified.
Do not use the company name alone. One company may offer several plans with different networks, costs, and coverage rules.
Also distinguish between:
- Insurance company: The organization that issues or underwrites an insurance policy.
- Dental plan: The specific product containing the applicable benefits and limitations.
- Provider network: The dentists and facilities participating under a particular network arrangement.
- Marketplace or comparison platform: A website that displays or facilitates access to products offered by other organizations.
- Dental savings or discount plan: A membership arrangement that provides reduced fees through participating dentists.
Dental savings or discount plans are not dental insurance.
A savings plan and an insurance plan should not be compared as though they use the same payment structure. Record the product type before comparing any price or benefit information.
Step 2: Confirm the Enrollment Tier and Effective Date
Next, verify who will be covered and when the coverage is expected to begin.
Record:
- Covered household members.
- Individual or family enrollment tier.
- Dependent eligibility requirements.
- Proposed effective date.
- Enrollment deadline.
- Initial contract or membership period.
- Renewal information.
- Plan-year dates for employer-sponsored coverage.
Make sure every person who needs coverage is included in the scenario.
A plan page may initially display an individual rate even when family coverage is needed. Similarly, an estimated start date may change during the application process.
Do not treat an online preview date as final until it is confirmed in the enrollment summary or other official communication.
Step 3: Collect the Same Official Documents for Every Plan
Try to collect the same types of documents for each option.
Depending on the plan, these may include:
- Policy.
- Certificate of Insurance.
- Evidence of Coverage.
- Schedule of Benefits.
- Summary of Benefits.
- Copayment schedule.
- Exclusions and limitations.
- Provider directory.
- State-specific disclosures.
- Enrollment terms.
- Cancellation and renewal terms.
Document names vary, so one plan may not use every title in this list. The important point is to obtain materials that explain the plan’s benefits, costs, limitations, and enrollment rules.
A comparison is not balanced when one option is evaluated using a complete policy while another is evaluated only through a short marketing page.
When a document is available online, record:
- Document title.
- Plan name shown in the document.
- State or service area.
- Publication, revision, or effective date when provided.
- URL.
- Date you accessed it.
Confirm that each document belongs to the exact plan and location being reviewed. Similar plan names can refer to different products, networks, or state versions.
Step 4: Verify the Exact Provider Network
A company name does not identify the exact network.
One company may use several networks, and a dentist may participate in one but not another. Record the complete network name exactly as it appears in the plan documents or enrollment materials.
Then verify:
- Dentist’s name.
- Practice name.
- Exact office location.
- Network name.
- Plan name.
- Specialist participation when relevant.
- Date the information was checked.
Use the official provider directory for the exact plan when available. Then contact the dental office and ask whether the dentist currently participates in that specific network at that specific location.
A directory result and an office confirmation may not always agree. If they conflict, do not assume that either answer applies automatically. Contact the insurer or administrator and request clarification.
Provider participation can change, and verification does not guarantee how a future claim will be processed. It does, however, help identify uncertainty before enrollment or treatment.
Learn more in In-Network vs Out-of-Network Dental Insurance.
Step 5: Record Costs in the Same Format
Record the same cost categories for every plan.
These may include:
- Premium.
- Individual deductible.
- Family deductible.
- Copayments.
- Coinsurance.
- Enrollment or processing fees.
- Membership fees for discount products.
- Out-of-network cost rules.
- Charges for noncovered services.
- Billing frequency.
- Renewal pricing information when available.
Do not evaluate the premium by itself.
A plan with a lower premium may use different deductibles, cost-sharing rules, provider networks, benefit limits, or exclusions. A higher premium does not automatically establish broader coverage.
Use the same labels and format for each option. For example, do not record only the premium for one plan while recording the premium, deductible, and coinsurance for another.
When costs appear in several locations, note where each amount came from:
- Quote page.
- Benefit summary.
- Policy document.
- Enrollment page.
- Written confirmation.
Read Dental Insurance Costs Explained for a detailed explanation of the cost categories that may affect total spending.
Step 6: Check Coverage Timing and Benefit Limits
After recording the costs, review when benefits begin and which limits may apply.
Check:
- Waiting periods.
- Annual maximum.
- Benefit period.
- Preventive, basic, and major service classifications.
- Frequency limits.
- Replacement rules.
- Age limits.
- Orthodontic limits.
- Alternate-benefit provisions.
- Missing-tooth provisions.
- Treatment-in-progress rules.
- Prior-authorization or pretreatment requirements.
If a particular treatment matters to you, verify the exact procedure and any related services separately.
For example:
- For a filling, check the restoration, tooth surfaces, material rules, and replacement limitations.
- For an extraction, verify the exact extraction procedure and any later tooth-replacement treatment separately.
- For a root canal, verify the endodontic procedure, treating dentist or endodontist, and the filling, crown, or other restoration needed afterward.
- For a dental bridge, review the bridge components, supporting restorations, missing-tooth provisions, and replacement rules.
For treatment-specific guidance, see Does Dental Insurance Cover Fillings?, Does Dental Insurance Cover Tooth Extraction?, Does Dental Insurance Cover Root Canals?, and Dental Insurance for Bridges.
Do not assume that every service begins on the policy’s effective date.
A plan may begin on one date while benefits for selected services become available later. Waiting-period rules may also differ by service category or may be affected by prior coverage documentation.
Similarly, the annual maximum may apply to some benefits but not others. Review how the plan defines the benefit period and which services count toward the limit.
For a fuller explanation, read How Waiting Periods Work in Dental Coverage and Dental Insurance Annual Maximums Explained.
Step 7: Investigate Missing or Conflicting Information
Do not fill an information gap with an assumption.
Additional verification is needed when:
- The quote page and policy document show different information.
- The plan name is incomplete.
- Two products have very similar names.
- The network is not identified.
- A document has no visible date or version.
- A benefit appears only on a marketing page.
- The provider directory and dental office give different answers.
- The annual maximum is unclear.
- A waiting period is mentioned without identifying the affected services.
- The seller, insurer, or administrator is not identified.
- A plan document appears to belong to a different state.
- A price changes between the quote page and enrollment summary.
- An important exclusion cannot be found.
When information is missing or inconsistent:
- Save the relevant webpage, screenshot, or document.
- Record the date and URL.
- Identify the organization responsible for the information.
- Contact the insurer, administrator, employer, marketplace, broker, or seller.
- Ask a specific question using the full plan and network name.
- Request written clarification when possible.
- Check whether a more recent document is available.
- Update your comparison record with the source and date of the answer.
If you cannot clearly identify the insurer, seller, broker, or organization responsible for the plan, check with your state insurance department before providing payment or sensitive personal information. The department may help you verify licensing information, locate consumer resources, or identify the appropriate regulator.
A useful question is more specific than “Is this covered?”
For example, identify the plan, service, network, location, effective date, and provision that appears unclear.
Written clarification can help document what you were told, but it does not replace the policy or guarantee that a future claim will be approved.
Step 8: Save the Documents and Confirm Enrollment Details
Before completing enrollment, create a final folder for the selected option.
Save or record:
- Final plan name.
- Product type.
- Insurer or underwriting company.
- Plan administrator when applicable.
- Exact provider network.
- Covered household members.
- Final premium.
- Billing frequency.
- Effective date.
- Enrollment or application date.
- Confirmation number.
- Seller or enrollment platform.
- Official documents reviewed.
- Provider-directory result.
- Relevant emails or written confirmations.
- Cancellation or renewal information.
Use clear filenames that identify the plan, document type, and date.
For example, using the document date or the date you downloaded it:
plan-name-schedule-of-benefits-YYYY-MM-DD.pdfReview the final enrollment summary before submitting the application. Confirm that the plan, household members, premium, network, and effective date match the information you intended to use.
Documents saved before enrollment help show what information was available during the comparison. They do not replace the final policy, member documents, or later notices issued by the plan.
Online Comparison Record
Use a simple record to keep the workflow consistent.
| Online comparison step | Where to look | What to record |
|---|---|---|
| Identify the product | Quote page, plan page, and disclosures | Company, exact plan name, product type, insurer, and enrollment channel |
| Confirm the enrollment scenario | Search form, quote summary, and enrollment page | Location, household members, coverage tier, and intended effective date |
| Collect official documents | Plan-document library and enrollment materials | Document title, plan name, state, version, URL, and access date |
| Verify the network | Plan documents, provider directory, and dental office | Exact network, dentist, practice location, specialist, and verification date |
| Record costs | Quote, benefit schedule, and enrollment summary | Premium, deductible, cost-sharing, fees, and out-of-network rules |
| Check timing and benefit limits | Policy, benefit schedule, and exclusions | Waiting periods, annual maximum, frequency limits, and replacement rules |
| Resolve missing information | Insurer, administrator, employer, seller, or marketplace | Question asked, organization contacted, date, response, and supporting document |
| Save final enrollment details | Final enrollment page and confirmation materials | Final plan, members, premium, effective date, confirmation number, and saved documents |
Use the Dental Plan Comparison Checklist to record the complete plan details side by side.
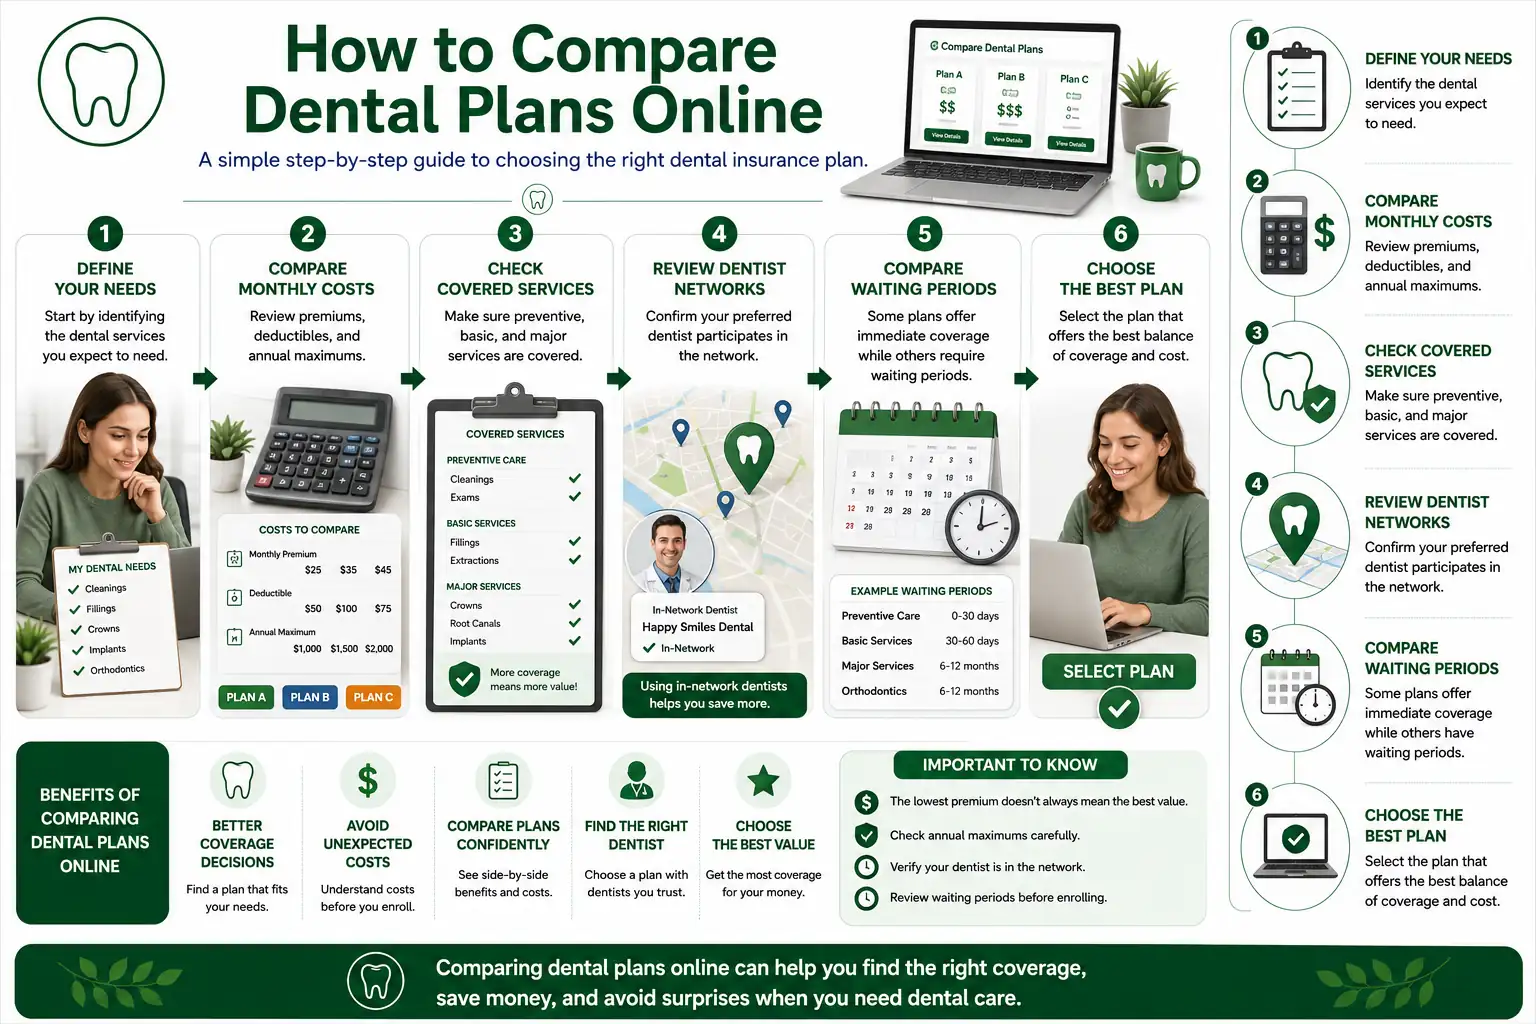
A Note for Employer-Sponsored Dental Plans
The same general process can be used for employer-sponsored coverage, but the available information may come from different sources.
Instead of starting with a public quote page, employees may receive:
- Enrollment guides.
- Benefit summaries.
- Summary Plan Descriptions.
- Payroll contribution information.
- Provider-directory links.
- Open-enrollment notices.
- Plan-year updates.
- Materials from a benefits administrator.
Compare the employee payroll contribution rather than treating the plan’s total cost as the amount deducted from each paycheck.
Also verify:
- Covered dependents.
- Exact provider network.
- Plan-year dates.
- Enrollment deadline.
- Changes from the previous plan year.
- Employer contribution.
- Information supplied by the benefits administrator.
Do not assume that an employer-sponsored plan uses the same benefits or network as an individual plan sold under the same company name.
When an Online Quote Needs Additional Verification
An online quote needs additional review when:
- The company operating the website is unclear.
- The product type is not identified.
- The insurer or plan administrator is not named.
- Official plan documents cannot be opened before enrollment.
- The premium changes without an explanation.
- The form includes unclear consent for calls, texts, or marketing.
- The effective date is missing.
- Cancellation or renewal rules are not available.
- The network name is not shown.
- The displayed benefits cannot be matched to an official document.
Do not submit additional personal information until you understand who operates the website, how the information may be used, and which organization is responsible for the product.
When a website identifies an insurance producer, broker, agency, or insurer, verify the organization through the appropriate state insurance department when necessary. A professional-looking website or familiar brand name does not by itself confirm that the seller or product is authorized in your state.
For the complete quote-verification process, read Dental Insurance Quotes Online.
Common Online Comparison Mistakes
Comparing Different Enrollment Scenarios
A comparison becomes unreliable when the plans were generated for different locations, household members, coverage tiers, or effective dates.
What to do: Write down one comparison scenario and use it for every plan search.
Mixing Information From Different Networks
A provider-directory result from one network may not apply to another plan offered by the same company.
What to do: Record the exact plan and network name before searching for a dentist.
Comparing a Full Policy With a Marketing Summary
A short plan card may omit exclusions, frequency limits, replacement rules, or enrollment conditions found in the official documents.
What to do: Collect comparable documents for every option before drawing conclusions.
Failing to Save Documents and Confirmation Details
Online pages and plan information can change. Without saved records, it may be difficult to reproduce the comparison later.
What to do: Save documents, URLs, access dates, written answers, and final enrollment details.
Practical Next Step
A structured online process helps you collect the same information for every plan and identify details that require additional verification.
It does not eliminate the need to review the official documents for the exact product or confirm questions with the responsible insurer, administrator, employer, broker, or marketplace.
For the broader comparison framework, visit Compare Dental Plans.
To organize the final details side by side, use the Dental Plan Comparison Checklist.
Helpful Resources
Use these guides to review specific parts of the comparison process in more detail:
- Compare Dental Plans — Understand the broader framework for comparing costs, coverage rules, provider networks, and benefit limits.
- Dental Plan Comparison Checklist — Record the complete details for multiple plans in a consistent side-by-side format.
- Dental Insurance Quotes Online — Learn how to verify a quote, identify the website or seller, and review the information provided before enrolling.
- Dental Insurance Costs Explained — Review premiums, deductibles, copayments, coinsurance, and other costs that may affect total spending.
- In-Network vs Out-of-Network Dental Insurance — Understand why the exact network and dentist location matter during an online comparison.
- Dental Insurance Coverage for Common Procedures — Review procedure-specific coverage questions when expected dental treatment is part of your plan comparison.
- Dental Insurance Learning Center
Frequently Asked Questions
What information should I keep consistent when comparing dental plans online?
Use the same state and ZIP code, covered household members, individual or family tier, intended effective date, enrollment channel when possible, and expected-care assumptions.
Comparing plans generated for different scenarios can make the displayed prices and benefits misleading.
Is a comparison website enough to evaluate a dental plan?
No. A comparison website can help identify available options, but it may not display every exclusion, limitation, network rule, or enrollment condition.
Open the official documents for the exact plan and verify unresolved questions with the responsible organization.
How can I tell whether two dental plans use the same network?
Look for the complete network name in each plan’s documents and provider-search instructions.
Do not assume that plans offered by the same company use the same network. Search for the dentist under each exact network and confirm the relevant office location.
What should I do when a quote and policy document do not match?
Do not assume which version is correct.
Save both sources, record their dates and URLs, and contact the insurer, administrator, seller, employer, or marketplace. Ask for clarification using the complete plan name and request a written response when possible.
Which documents should I save before enrolling?
Save the available policy or Certificate of Insurance, Evidence of Coverage, Schedule or Summary of Benefits, exclusions and limitations, provider-directory results, enrollment terms, final premium, effective date, and confirmation information.
Also retain relevant emails or written answers to unresolved questions.
Can I use the same process for employer-sponsored dental plans?
Yes. Use the same principles, but gather information from the employer’s enrollment materials, Summary Plan Description, benefit summary, provider directory, and benefits administrator.
Record the employee payroll contribution, covered dependents, plan-year dates, exact network, and enrollment deadline.
Sources
- HealthCare.gov — Dental Coverage in the Marketplace
- American Dental Association — Types of Dental Plans
- American Dental Association — Typical Dental Plan Benefits and Limitations
- American Dental Association — Explanation of Benefits Statement
- U.S. Department of Labor — Plan Information
- National Association of Insurance Commissioners — Understanding Your Dental Insurance
- National Association of Insurance Commissioners — State Insurance Departments
About the Author
Maria Dumitru is the founder and content editor of Dental Coverage Hub. She researches and develops educational resources designed to help U.S. consumers understand dental insurance plans, coverage rules, costs, provider networks, and comparison factors.
Learn more about our standards in the Editorial Policy and How We Review Dental Plans.
Dental Coverage Hub provides general educational information and does not provide medical, legal, financial, or personalized insurance advice.

Organize the Details Before You Enroll
Use the same comparison criteria for every plan, record the information you verify, and review the official documents before making an enrollment decision.